ReadyGSM makes it easy to setup and launch servers for games. But there are still a few steps left to make sure that you and your friends can join the game from outside your local network. This involves port forwarding and some Windows Firewall settings that need to be done. In this article, we’ll focus on the common setup where you have Internet coming into your home and you have one router setup on your network. If you have a more complicated setup, you can contact us and we’ll try to help your specific situation.
Here are the basic steps we need to consider:
- Router Port Forwarding
- Windows Firewall
Here is a quick video that shows the steps before we explain each step in more detail.
Now let’s go over the steps in more detail.
Router Port Forwarding
There are many different types of routers, but most of them have a port forwarding option. The screenshots may be different for your router, but these steps are going to be similar. You can also see references on PortForward.com where you can get some additional information on their website.
What ports need to be opened?
ReadyGSM creates three port ranges that it uses to assign to servers:
- Public UDP
- Public TCP
- Private TCP
NOTE: The current version of ReadyGSM does not use the Public TCP ports. Those will later be used to assign to Remote Console (RCON) if they are desired to be used from outside the local network.
Public UDP and TCP are generally used when a game needs those ports for the main access to the game. The Private TCP is used for setting up the Remote Console (RCON) which allows for controlling the server and sending console commands. ReadyGSM currently uses this to do things like asking the server to shut down cleanly.
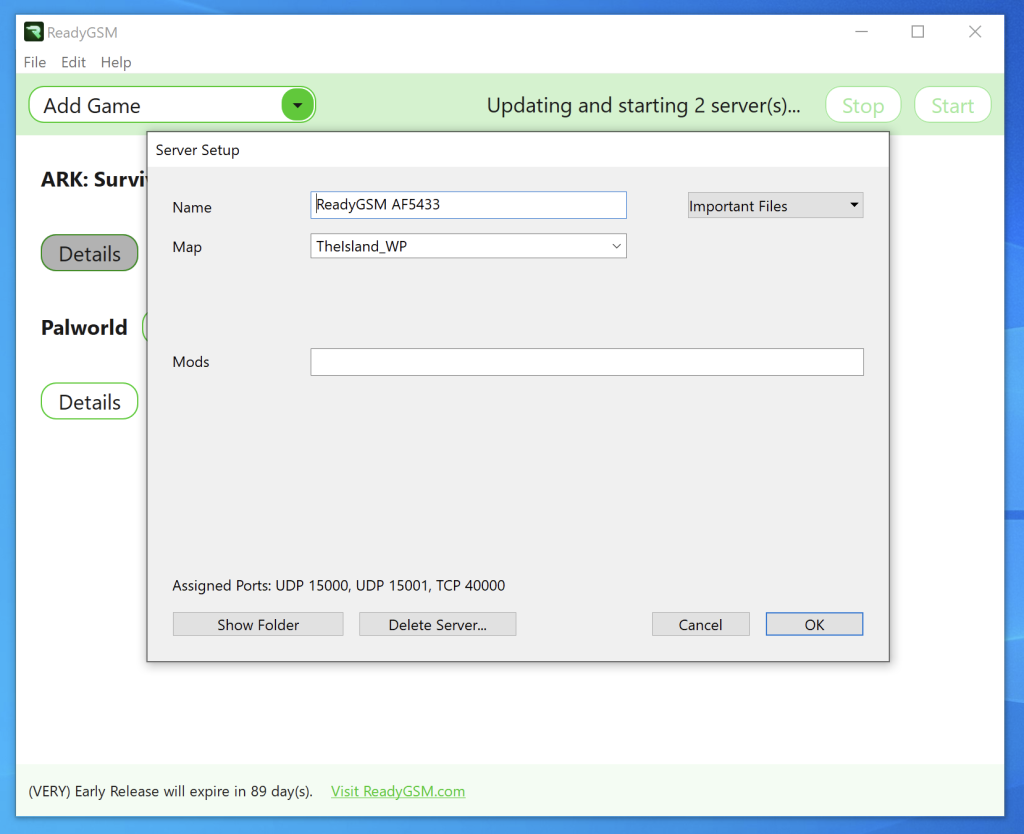
When you click the Start button, ReadyGSM will configure the servers by assigning them specific ports that will be used from the available ranges. You can modify the ranges in the Settings if you want custom ranges. To see which ports were assigned to the servers, you can view them in the server details window like below.
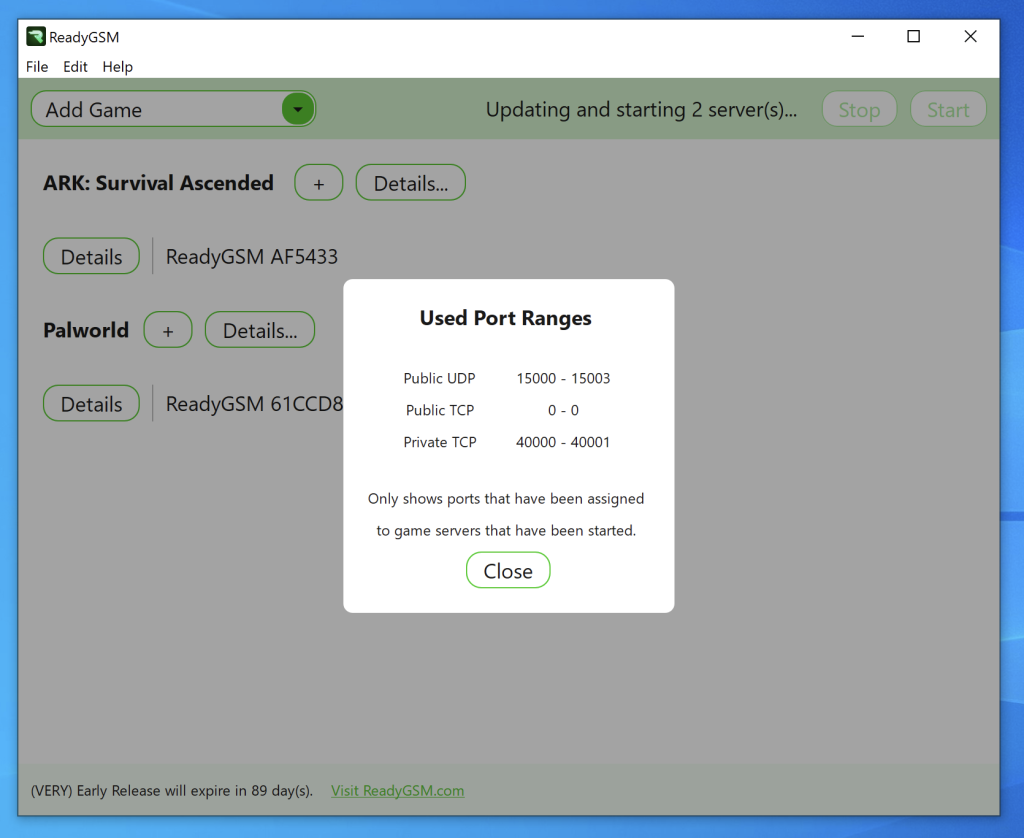
If you want to see the entire port ranges that have been used, you can choose “Show used ports” from the Help menu. You can then see which ports have actually been assigned from the ranges setup in the Settings screen.
Login to your router
Now that you know the ports ranges that need to be opened, you can login to your router. Each router is different, but many of them can be configured in your web browser by navigating to the router’s built-in web server admin panel. This is typically done by finding out what IP address your router is listening on. For many routers, it will be something like 198.162.0.1 but your router configuration may be different. Look up information about your specific router in the user manual, or at the PortForward.com website to see if you can determine how to access the admin panel for your router.
Add Forwarding Route or Virtual Server
Different routers have different names for what we are looking for, but often you will find a port forwarding section in your router admin. This may also be referred to as NAT Gaming, or Server Forwarding, etc. Once you locate it, you need to setup a forward for the specific port ranges and protocols to make sure requests to your network are being forwarded to the machine you’ll use as a server. Here is an example of adding a port forwarding route to a router.
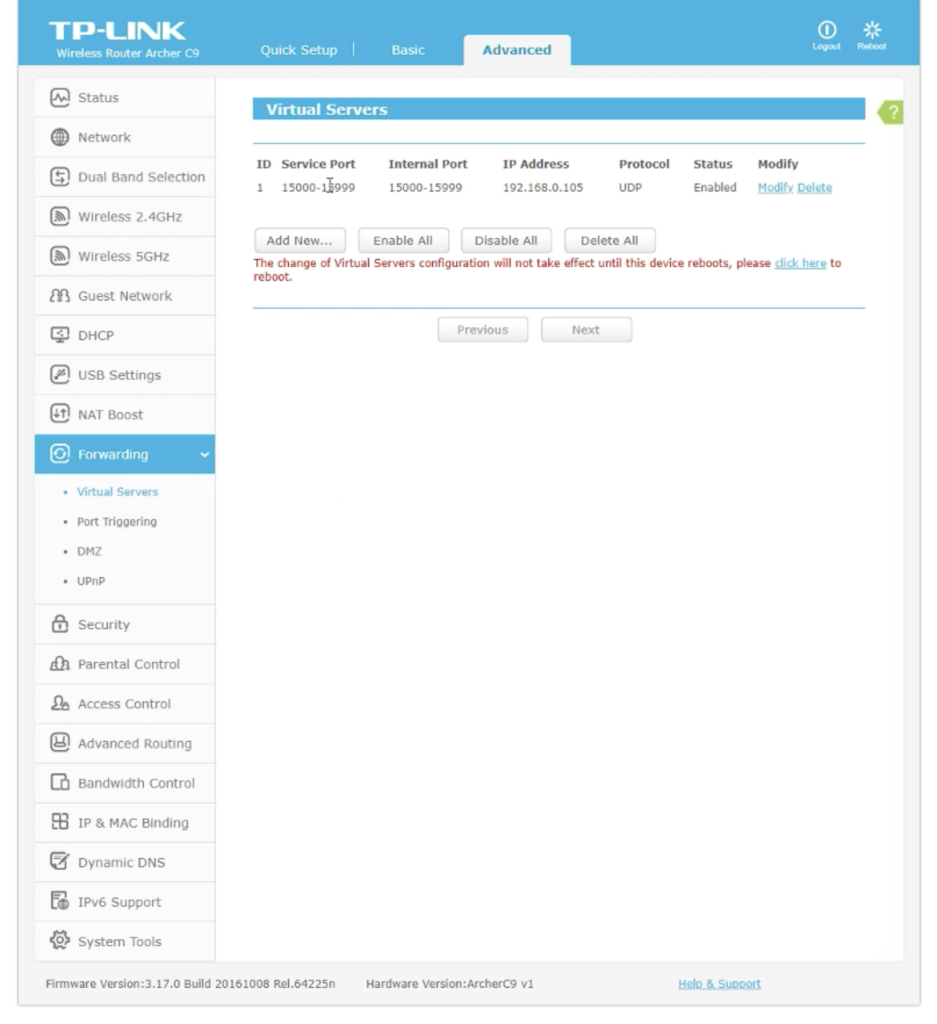
You can decide if you want to open the entire range Ready GSM may use, or just the range of ports that the servers are actually using. For security purposes, it isn’t great to have ports opened that aren’t needed. So it may depend on how often you plan to add and remove servers on your network. If you are constantly making changes, you may decide to forward a range that gives you some flexibility so you aren’t having to constantly adjust the forwarding rules. That choice is yours.
You will want to follow these steps again for the Public TCP port range. But do not expose the Private TCP range this way, or you will be allowing those ports to be public, which is not intended.
Add Inbound Rules to Windows Firewall
Windows Firewall can be modified using a program that is already installed on your computer. You just need to make sure you search for it from the Start menu and be sure to launch it using administrator permissions. Then you can choose the Inbound Rules section and create a New Rule.
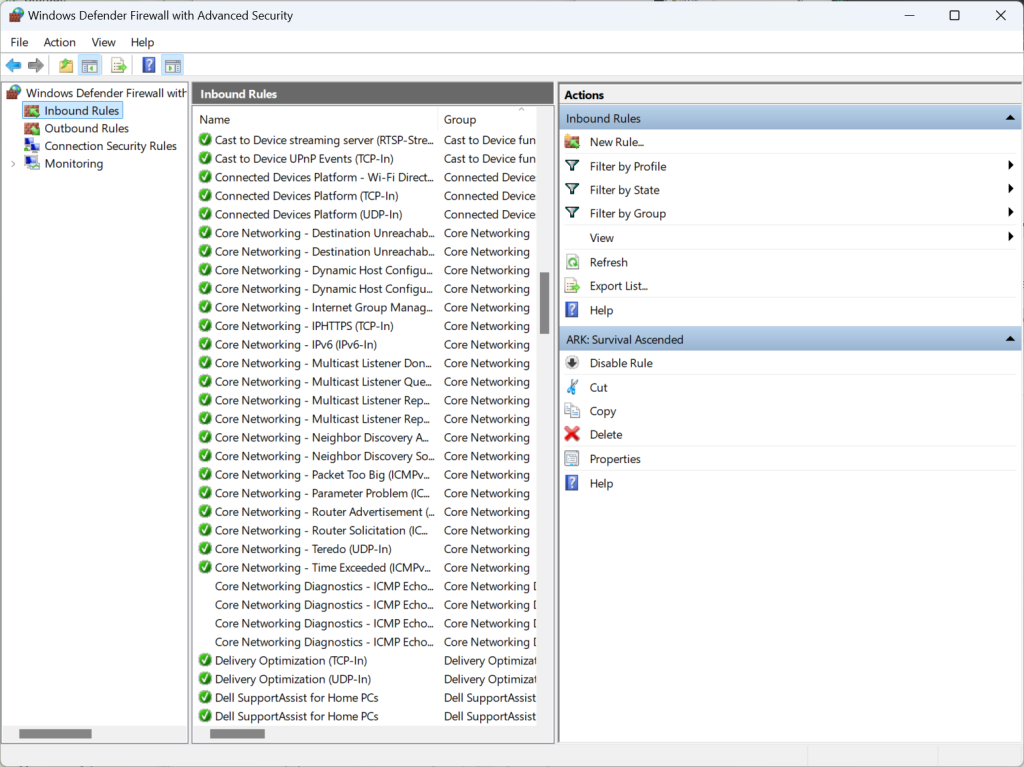
Setting up a New Rule does take a few steps, but most of the steps are just left at default values.
- Rule Type
- Protocol and Ports
- Action (Default)
- Profile (Default)
- Name
For Rule Type, choose the Port option.
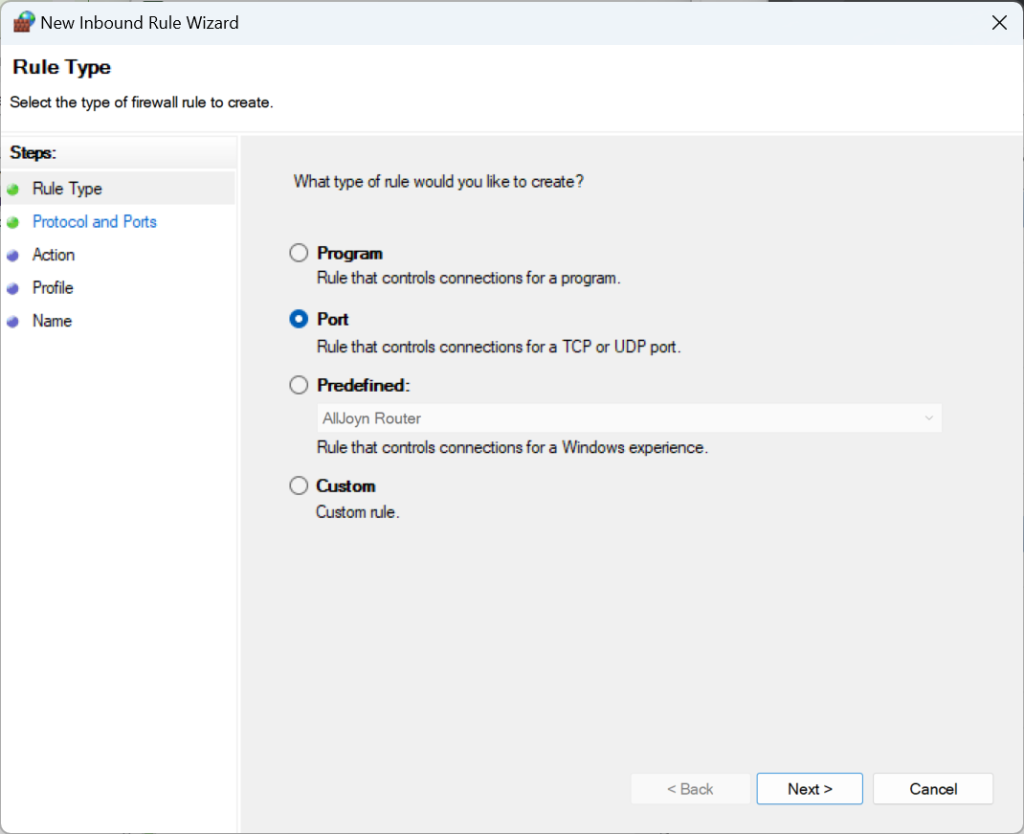
Click Next, and we need to setup the Protocol and Ports. Here we select UDP and put in the port range we found in ReadyGSM for Public UDP, which is 15000-15999 by default. If you have changed these values in ReadyGSM settings, then use the range you chose.
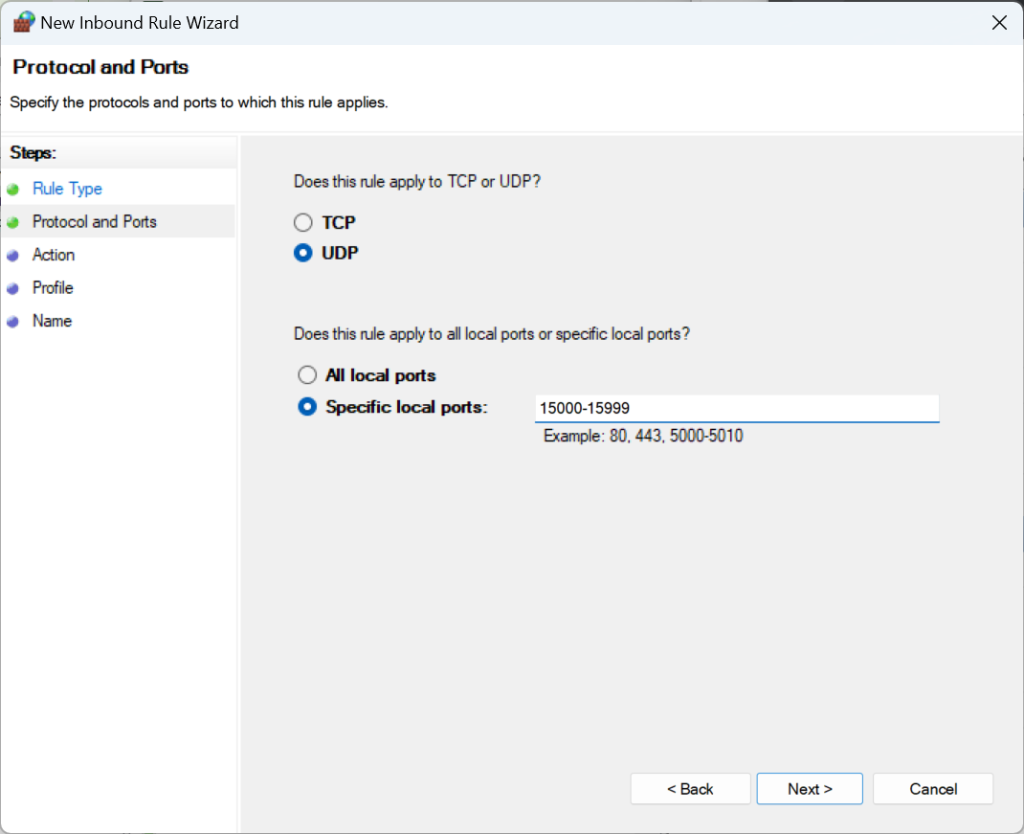
Click Next, and we need to setup the Action and Profile, however those are already setup correctly, we just need to click Next past both of them. They should look like the below screenshots.
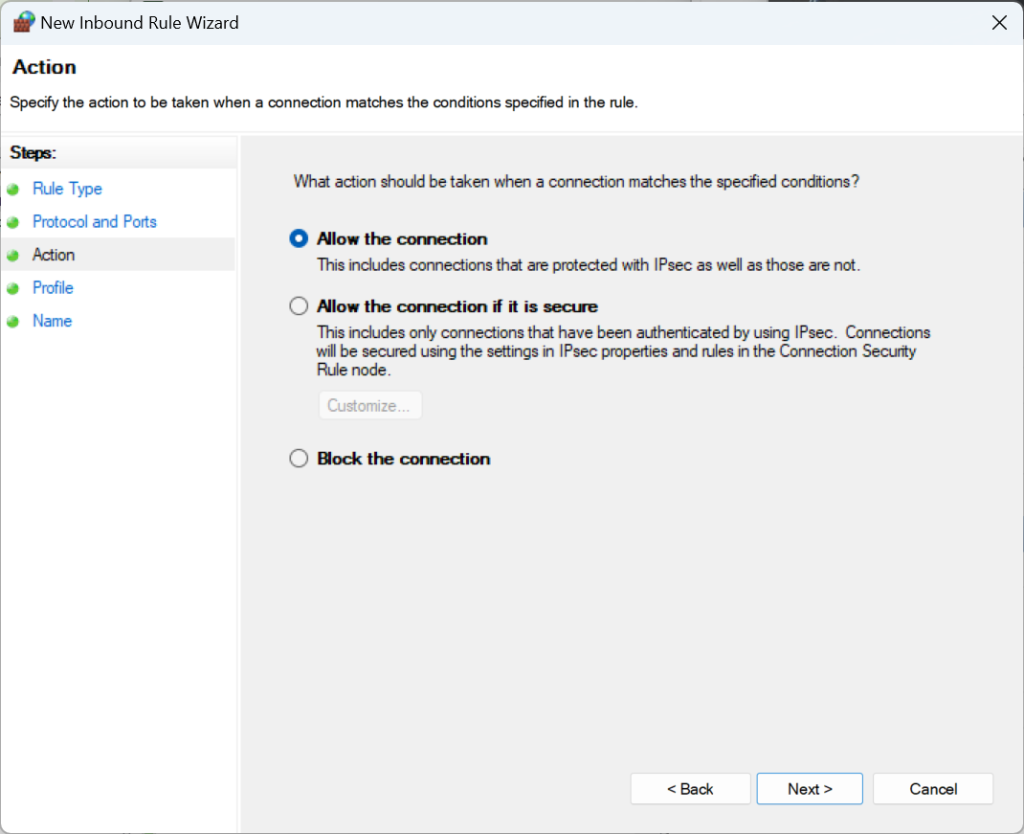
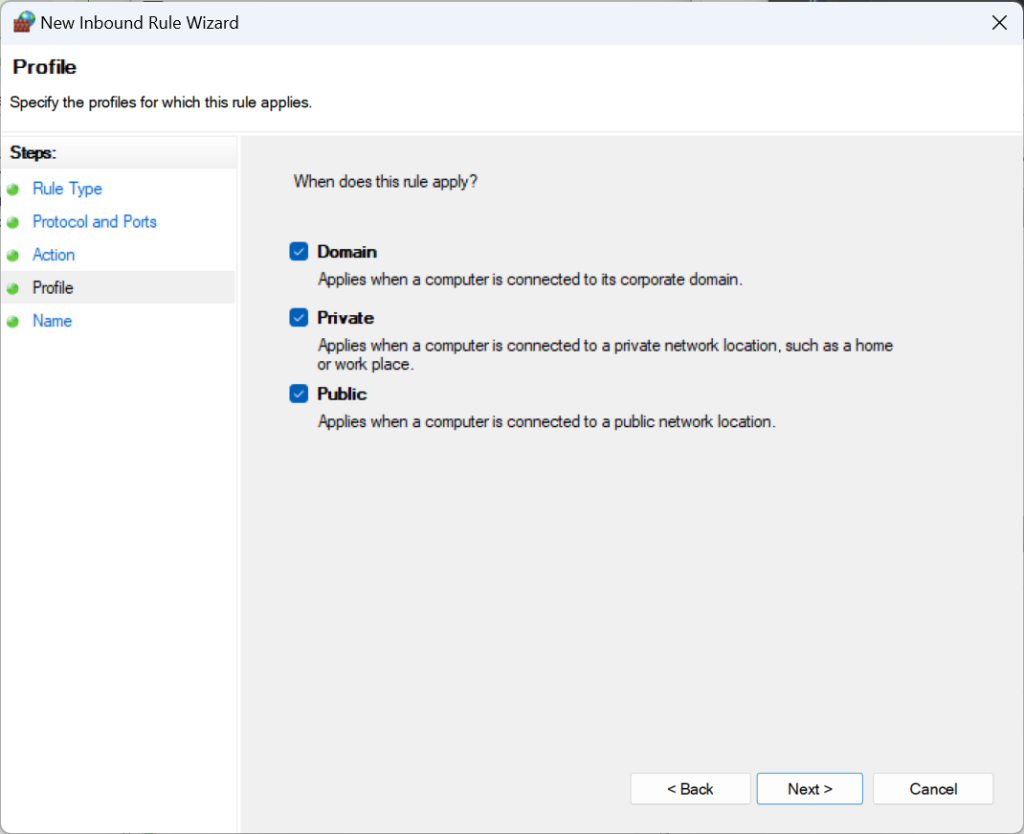
The final step is the name of this rule. You can name it whatever you like, but we recommend something like ReadyGSM Public UDP so it is something you’ll remember if you need to delete it or modify it later.
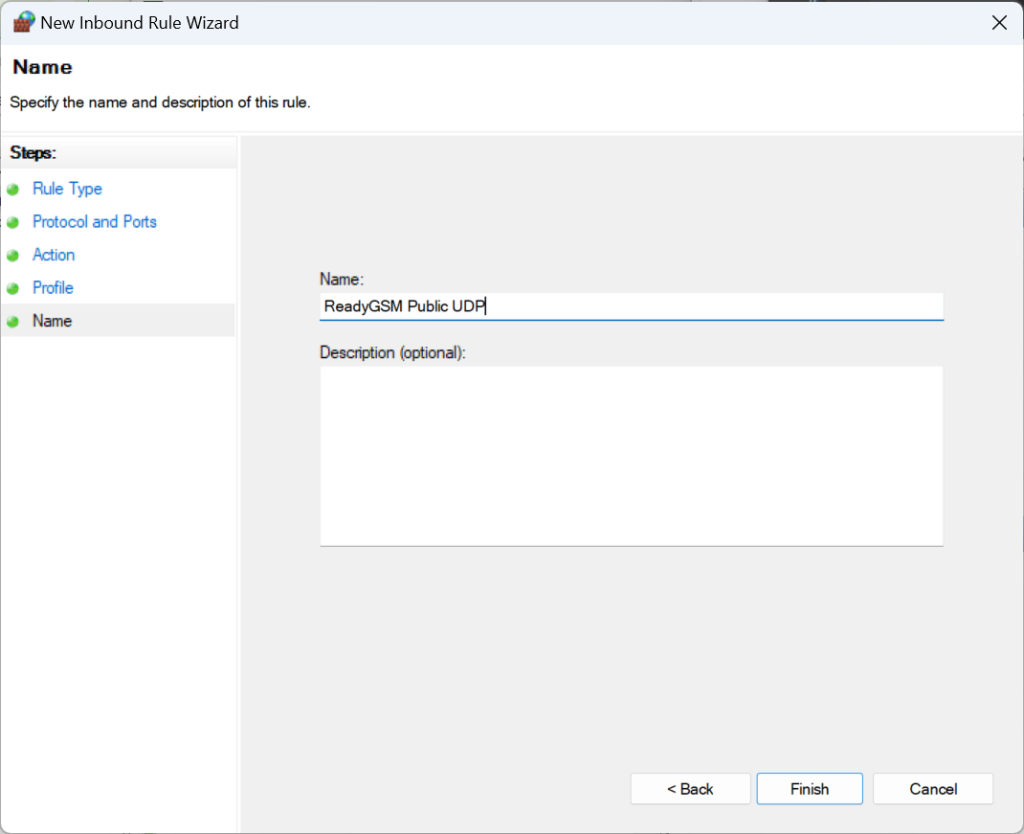
You can click the Finish button to add your configured rule. This rule tells Windows that it should allow traffic in these ranges to be forwarded to the apps that are listening on those ports. Some games, like Ark: Survival Ascended, will also prompt you to allow traffic through the firewall to the specific app. You’d want to Allow this action when prompted by a specific server you are setting up to ensure that it is allowed to listen on the configured ports.
You will want to follow these steps again for the Public TCP port range. But do not expose the Private TCP range this way, or you will be allowing those ports to be public, which is not intended.
NOTE: In the future, ReadyGSM will provide a setting to allow Remote Console (RCON) to be public, but for now it always uses the Private TCP range ports. Let us know if you’re interested in exposing your RCON port to the public.
You’re all set
Now that you have configured port forwarding on your router, and Windows Firewall allows the servers to listen on those ports, you should be able to connect to the game server from outside your network as well as from within.
If you have any trouble with the steps, or need more information, be sure to contact us and we will try to support your specific situation.
Leave a Reply